As it's my first time doing this properly, I'm going to cover all of these levels in detail. Or as much as I think's appropriate.
Level 0
In level 0 we are given a username and password and we need to login using SSH. SSH (Secure Shell) is a protocol whcih allows for you to securely access networks and devices remotely.
To login to the SSH server we simply need to use the details provided in the level 0 page.
The command to do this is: ssh -p 2220 bandit0@bandit.labs.overthewire.org
After entering the command, we are welcomed to the server and asked for a password.
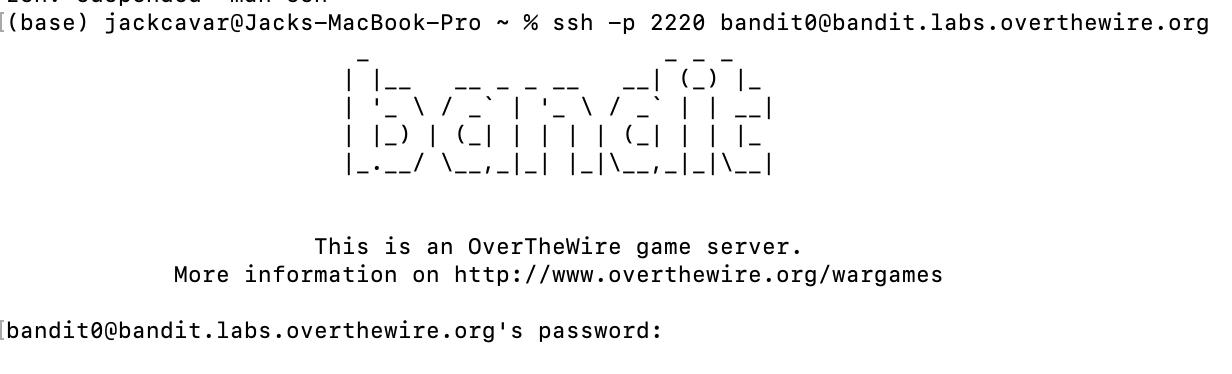
Once entering the password, we are logged in and welcomed to the server.
Level 1
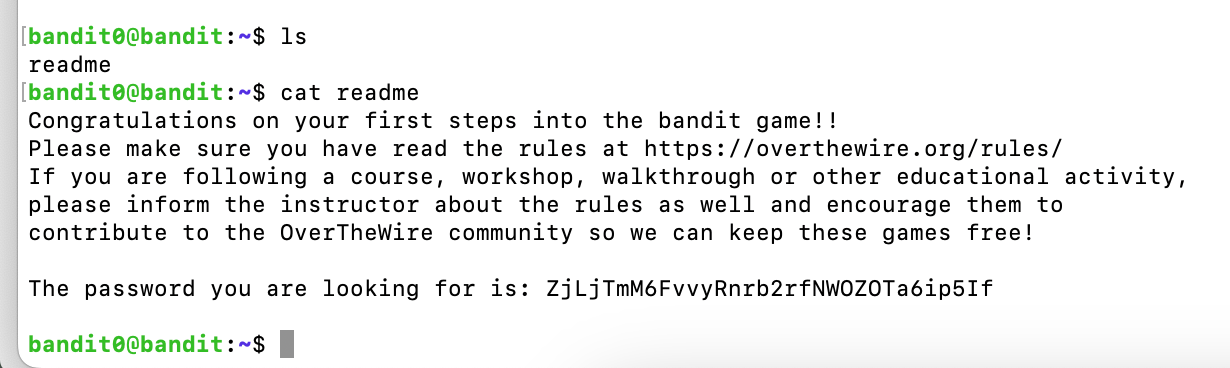
We are told in the instructions to locate the password for bandit1 in the readme file.
By using the ls command we can see that there is a file called readme.
We can use the cat command to read the contents of the file and display the contents of the file containing the password
Opening a new terminal, we can ssh in with the command: ssh -p 2220 bandit1@bandit.labs.overthewire.org, enter the password and access the next level
Level 2
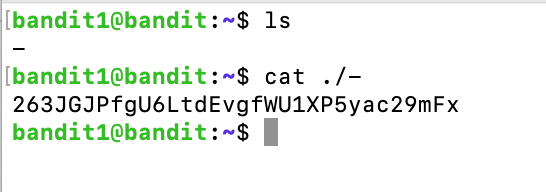
Level 2 attempts to step things up. We can see the file using ls is labelled as -.
To access this file we use the cat ./- . In this instance we must specify the location of the file in the relative file path to access
Level 3
Immediately on level 3, doing ls -al reveals the file we need to access with spaces
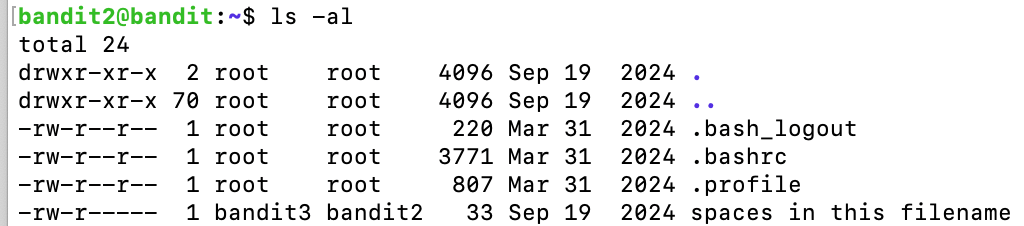
By treating the filename as one word, we are able to bypass any interpretation issues and access the contents of the filecat "spaces in this filename".

We can then use the password to access the next level
Level 4
Level 4 has a hidden file.
Running ls -al reveals a file called Hiding-from-you.

we can use the cat command to then view the password and move onto the next level.
Level 5
There are multiple files all starting with the -f flag. This flag will cause an error if we don't specify the relative file path beforehand in the message
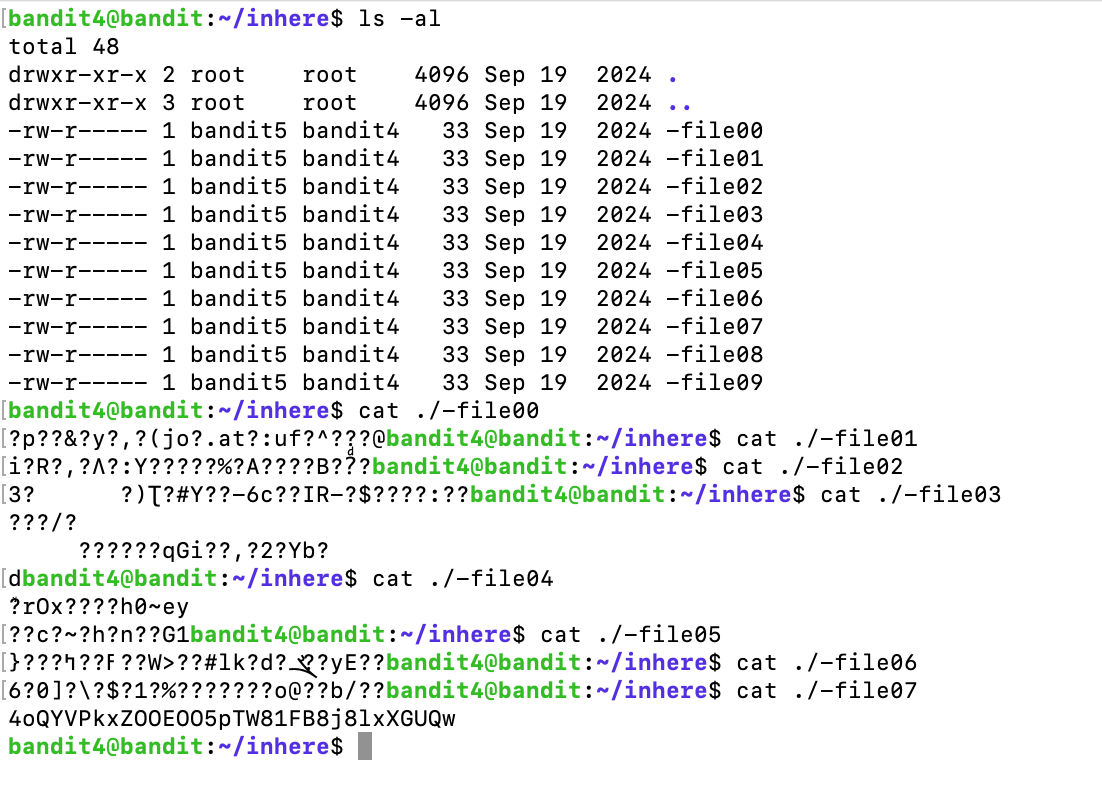
Within file 7 we find the password and can move onto the next level
Level 6
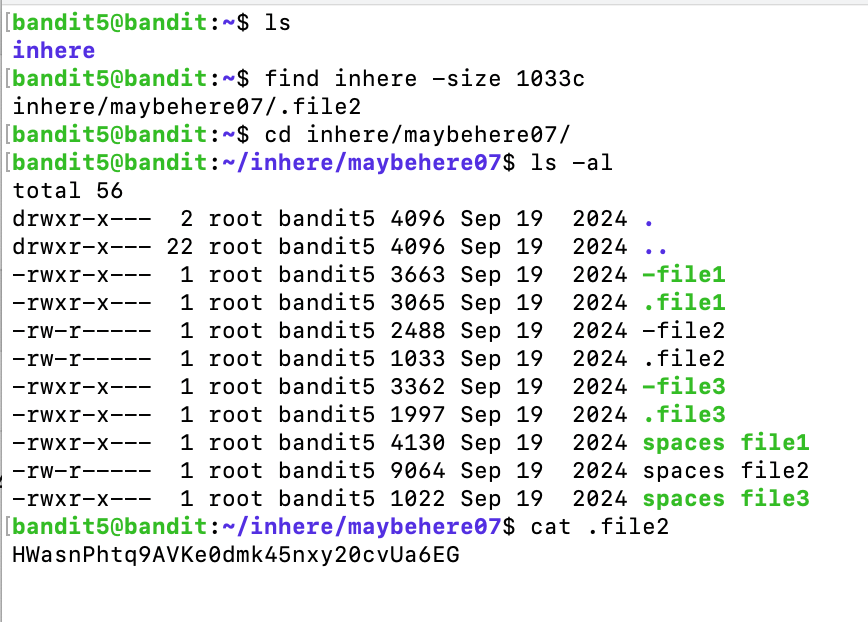
Level 6 has a file hidden within it that is a specific size. We can use the find command here looking at a specific file size and locate the specific file instantly and grab the password
Level 7
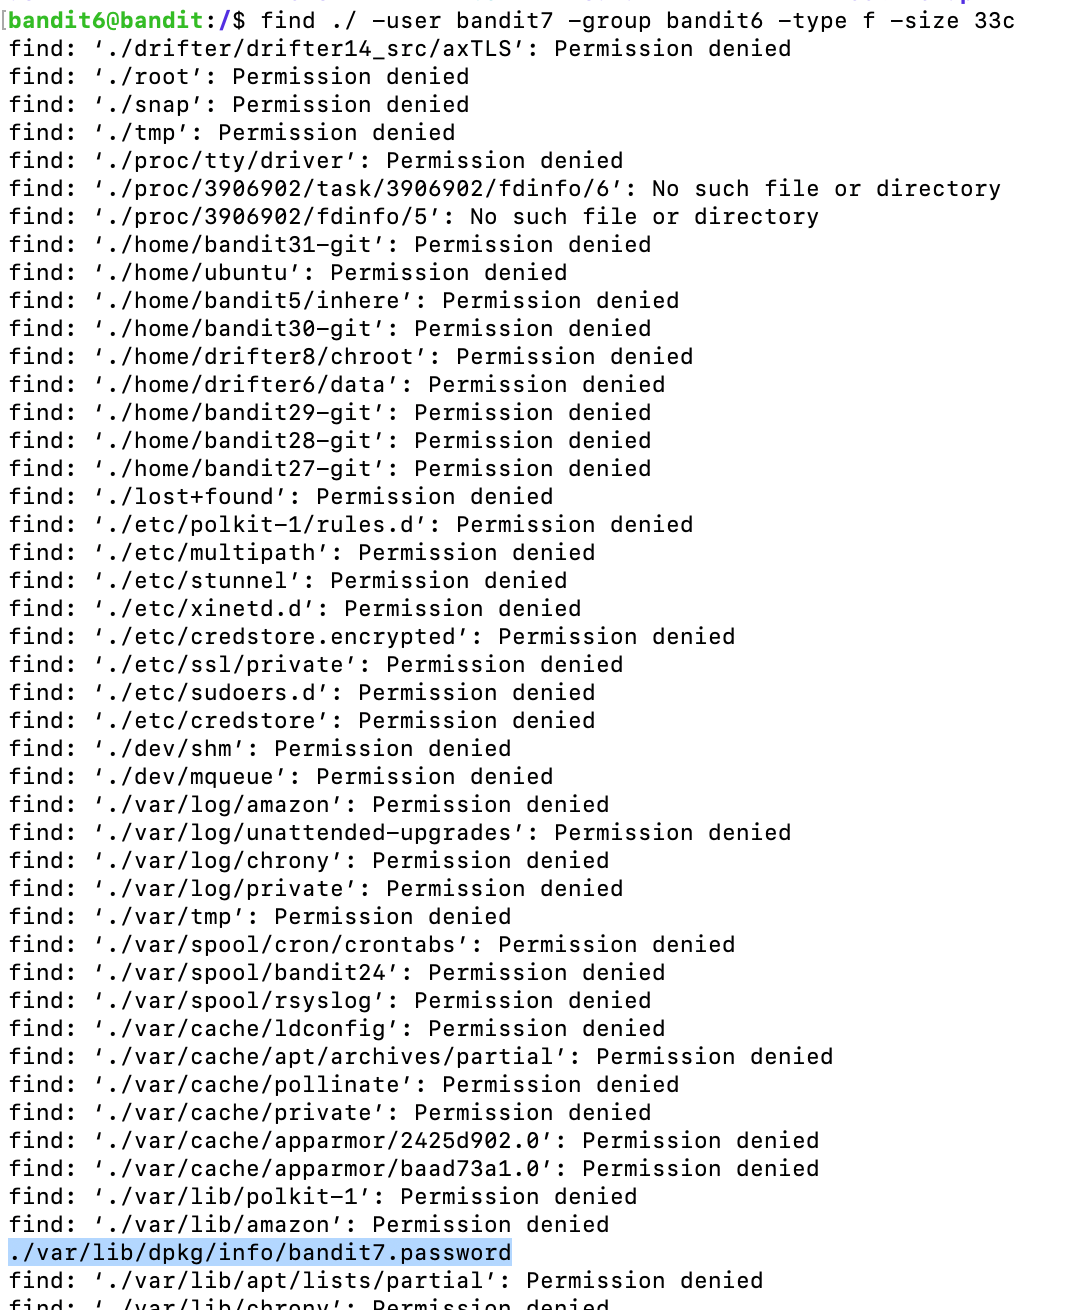
We are told that the file is owned by a specific user and the file is a specific size. We can use the find command again to locate the specific file and user ownership using the command find ./ -user bandit7 -group bandit6 -type f -size 33c
Level 8
We are told that the password is within the data.txt file where the password for the next level is attached beside the word millionth. We can use the grep command to search this file using the command grep millionth data.txt

Level 9
We are told that data.txt contains a line where there are no other duplicates in it. We can grep this file and then pipe the command to filter them out to the unique options

Level 10
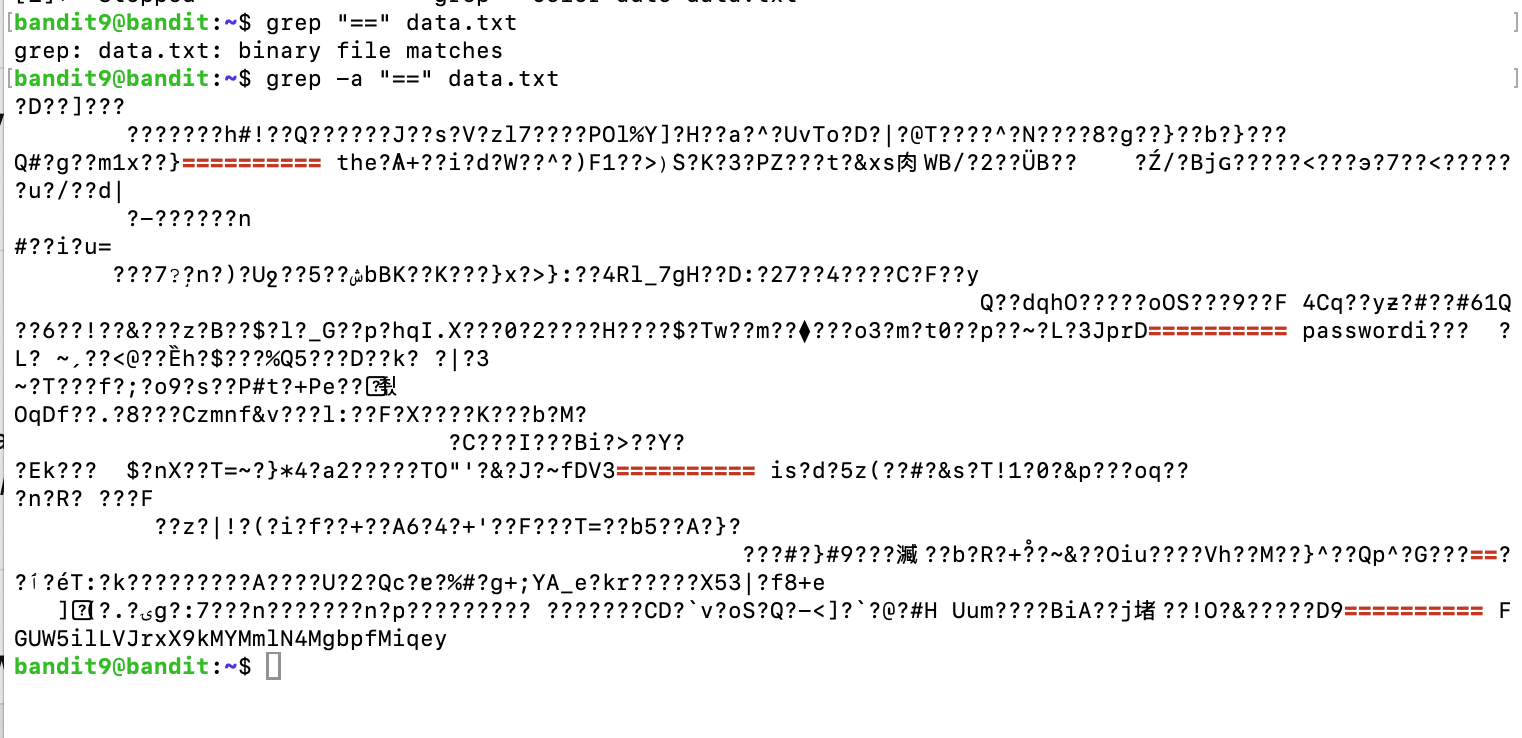
We are told that the file contains the password after multiple === signs. As the file is a binary text file, we must force grep to display results and treat the file as a text file using the -a flag
Level 11
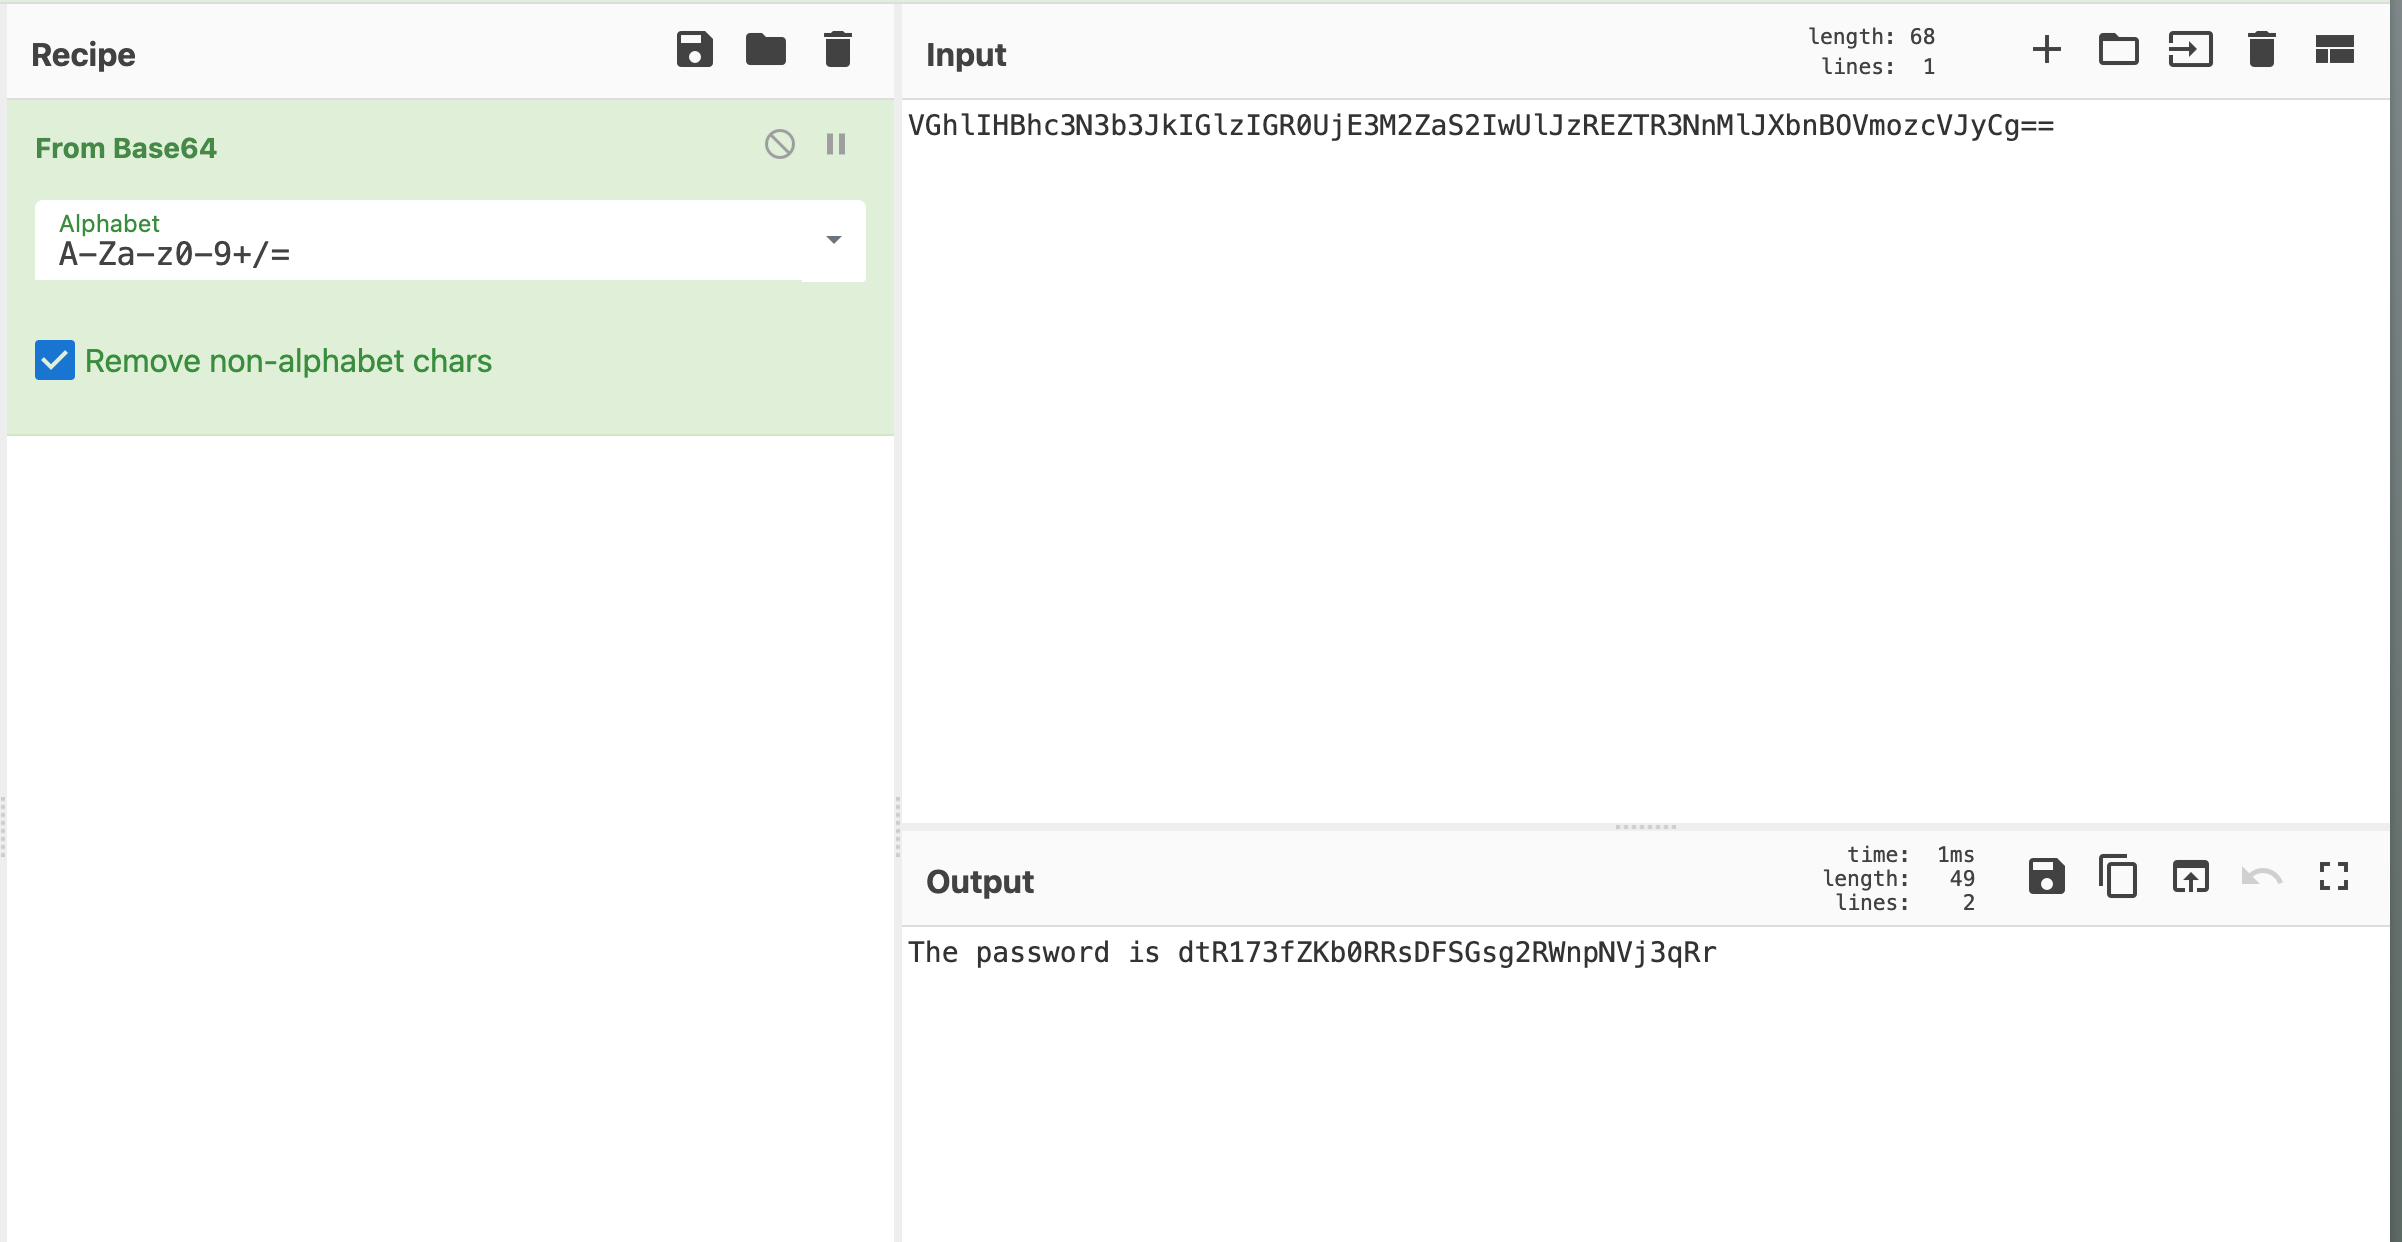
This level contains the password hashed in base64 hash. Because I'm lazy and hardwired for using cyberchef, cyberchef decodes and gives us the password
Level 12
We are told that the password has been shifted 13 letters ahead. We must find a function to shift the code backwards. Fortunately searching up online shows the rot13 function which can be used to echo out the correct password


Level 13
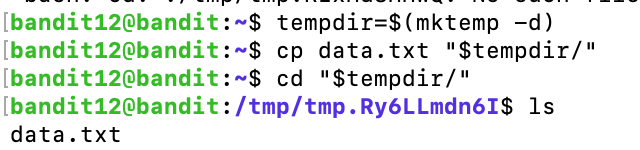
We are given a hexdump compressed file in this task. It is suggested that we copy the file over to a temp file in case we mess anything up
Once we have navigated to this directory, we can begin. The file is extremely compressed and we need to decompress it.
We now need to find the correct format for decompression to occur. Looking at the first bytes we can see the magic numbers 1f8b which tells us that this file is a gzip compressed format

We know that the file is a hexdump and must be initially converted to that format to begin decompressing.
We can use the command xxd -r data.txt recovered.gz. We can then use gunzip to decompress the file into it's next stage

Looking at the recovered file, we see that it is in the bzip2 format

We can then use bunzip2 recovered to get the next file.

The recovered.out file is another gunzip file so we can decompress it in the same method as used before.


Afterwards, we are given a tar file which can be decompressed using the tar command tar xvf recovered.tar
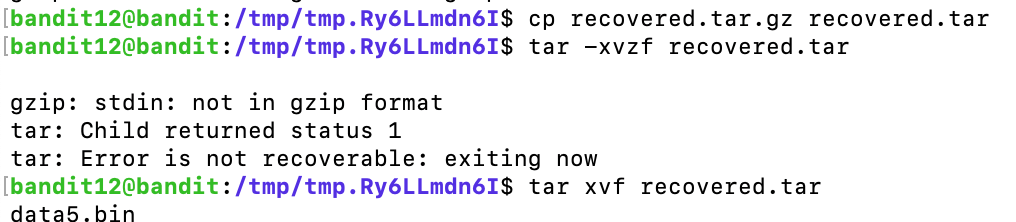
The next few decompresses follow a similar format of tar, gzip and bzip2 (popular compression languages) until a text file with the final password is revealed

Level 14
This excercise is a little different. We are told that we have been logged in as bandit13 and need to go to bandit14.
We have been given a ssh private key. It should be as easy as sshing into bandit14 using ssh -i sshkey.private bandit14@bandit.labs.overthewire.org
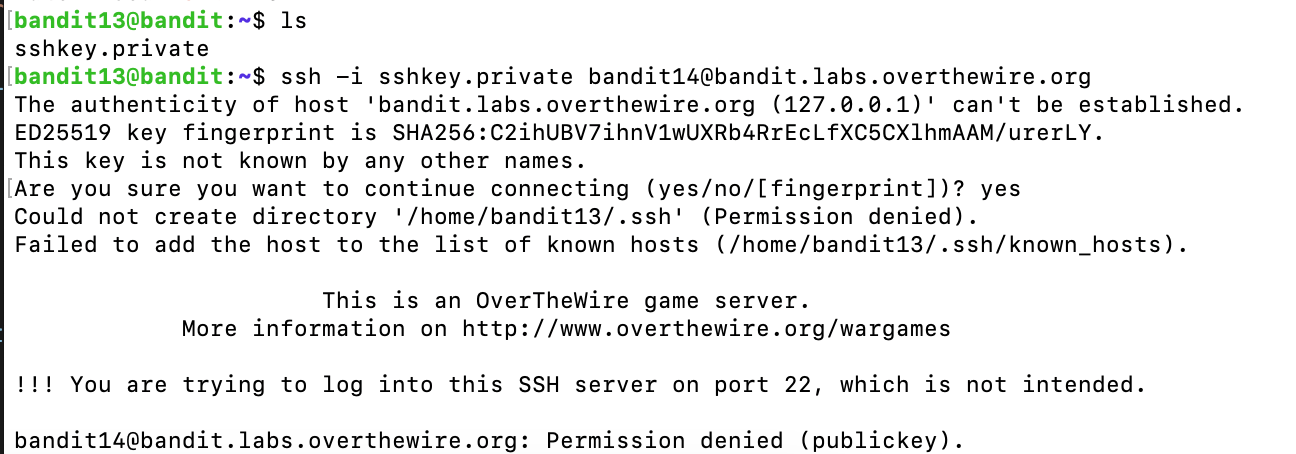
We are given a permission denied error! We have to find a different way!
Fortunately there is a file under /etc/ssh/sshd_config which tells us about incoming ssh connections on the system. We can learn what ports are used for ssh
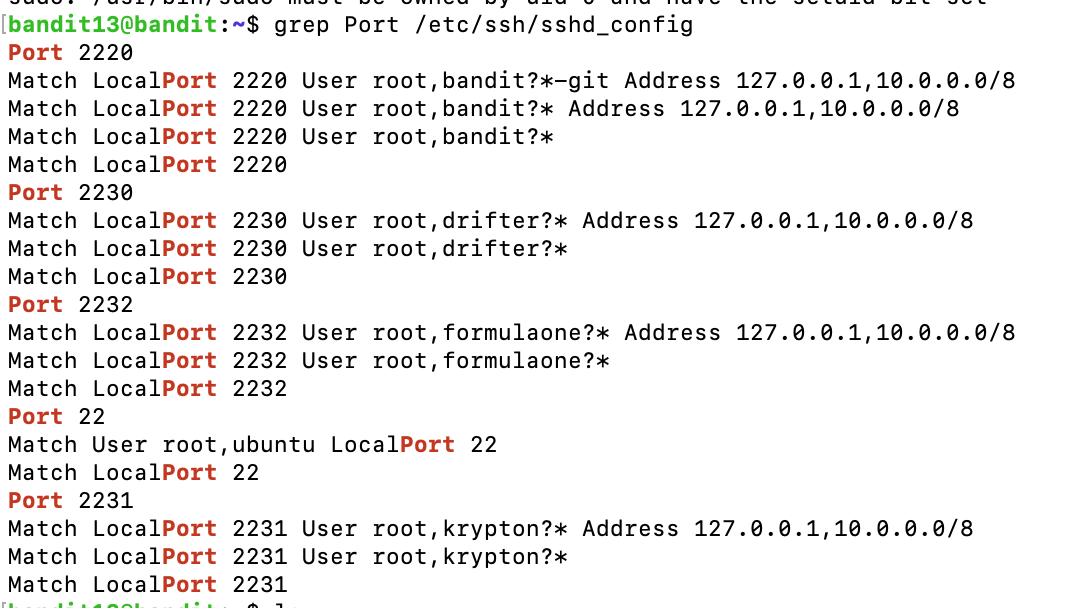
This reveals that bandit uses a unique ssh port of 2220. We can use that for our connection to access the nest level.
The full command is ssh -i sshkey.private -p 2220 bandit14@bandit.labs.overthewire.org
Level 15
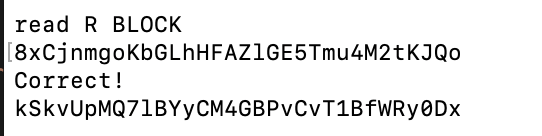
We are told that we can submit the password of the current level to localhost 30000 to access the next level.
We can access the password of the level through /etc/bandit_pass/bandit14
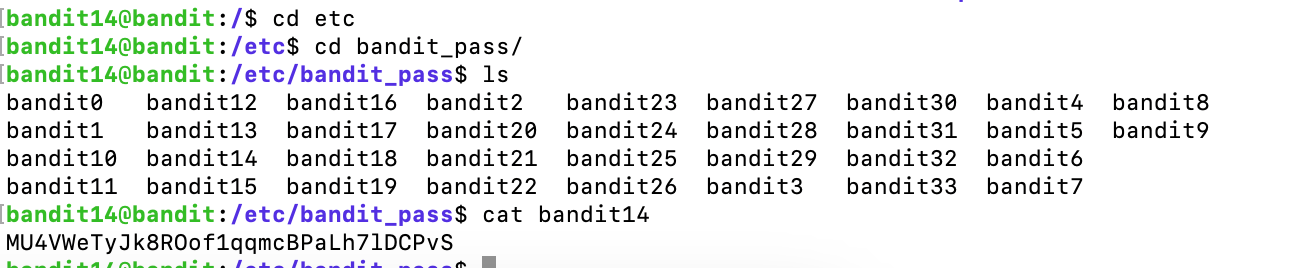
With this password we can use nc (netcat) to echo the password to the localhost 30000. nc is a networking utility that reads and writes data across network connections using TCP or UDP.

Level 16
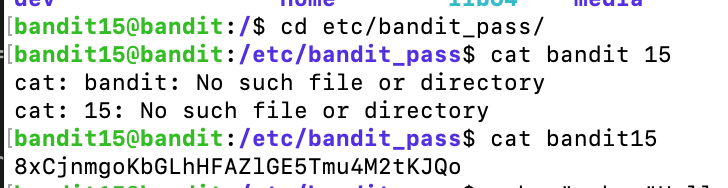
This exercise asks us to submit bandit15's password to a connection on port 30001 that is ssl/tls encrypted.
First let's get the password for bandit15 in /etc/bandit_pass/bandit15.txt
Now ssl encryption can be handled using openssl, a
We can use the command openssl s_client -connect localhost:30001 to connect to the server and then enter the password of bandit15
OpenSSL is a widely-used, open-source software library that provides cryptographic functions, including secure communication protocols like SSL.
s_client refers to testing the connection to a server. Exactly what we need here to grab the password of the next account!
We can then use the password to access the next level
Level 17
In this level we are told that we need to submit the current password to a port that speaks SSL/TLS. Right away we know that the final thing we will have to do is use openssl or another command to connect to the port. Using nmap, we can discover the correct port to access.
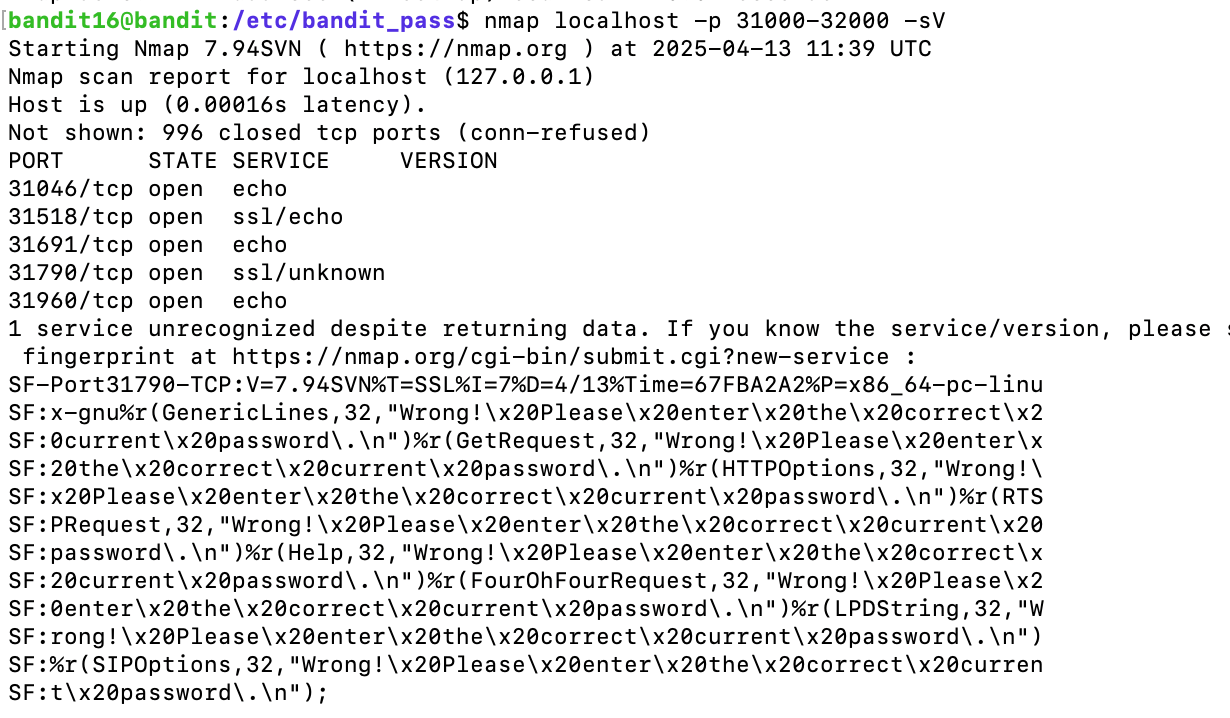
We can see that the port 31790. Using ncat, we can then attempt a ssl connection to the port and pass in the password.
The command is ncat --ssl localhost 31790
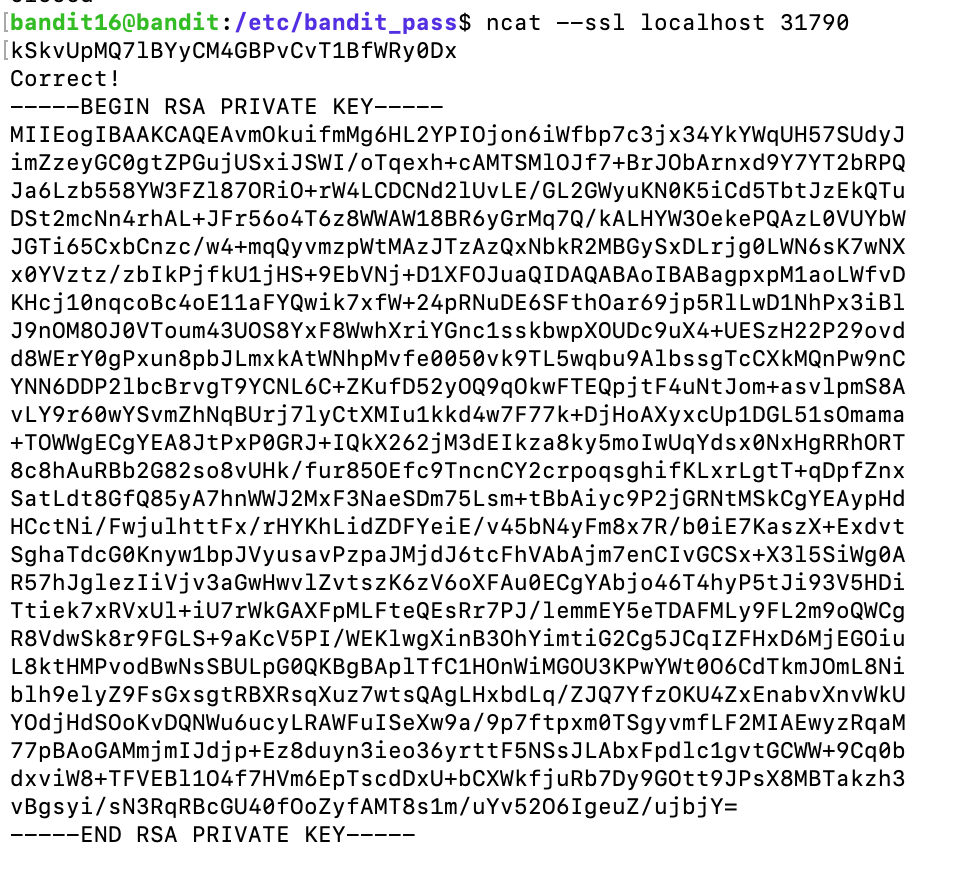
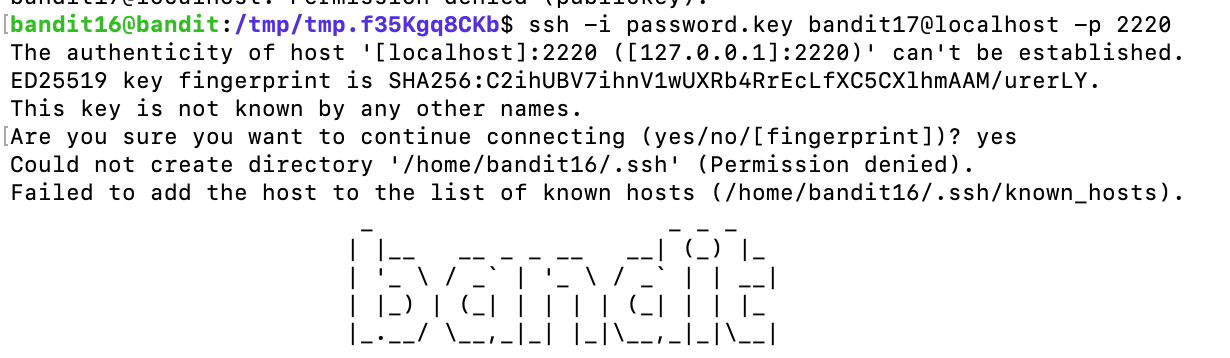
We are given a private key. Not a password! This time we're going to have to make a new directory and login using ssh.
Level 18
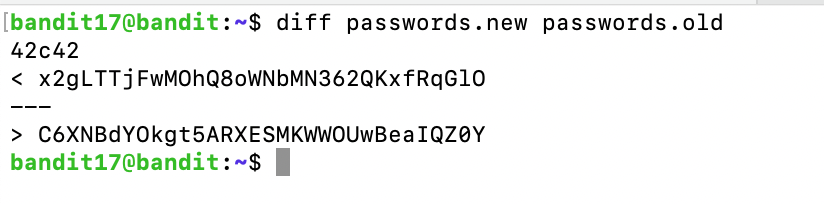
This is a nice easy level. We have two passwords lists and told that the difference in passwords between the two files holds bandit18's password. We can use diff to make it work and move onto the next level
Level 19
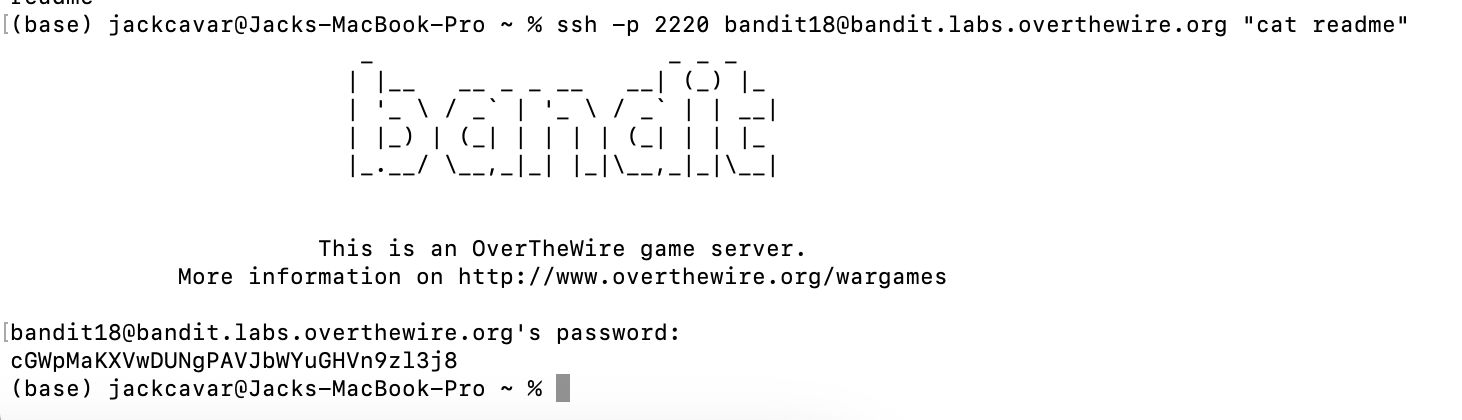
As soon as we enter a password in using our normal ssh method, we receive a bye bye message

This isn't good. Fortunately we are told that the readme file in the home directory contains the password for the next level. We can use ssh's ability to run commands on login to grab the command before we are logged out.
We can ssh in using the command ssh -p 2220 bandit18@bandit.labs.overthewire.org "cat readme" and collect the password to the next level
Level 20
We are told that there is a setuid binary which allows us to access the nest user account with the same permissions as them. As such we can execute the binary and get the password to the next level

Level 21
This is a tricky one. There is another setuid binary which we can use to talk to the next server.
We are told that we have to pass the password on a port to the server.
We can use nc and echo for this.
By piping the echoed password through to nc we can send the password to the server and get the next password using the binary

We use -l to initiate a connection on the port and & at the end to ensure that we don't have to wait for nc to finish before receiving the output from the command
We can then move onto the next level with the password
Level 22
In this level we are told that there is an action running under cronjobs on intervals. Cron is a tool used for setting up scripts that run on certain days (or multiple times a day!) When we have a look at the job we are provided with the location of the bash script being run.

Analysing the contents of the bash script, we can see two things happening on out machine, firstly the password file is being given read write permissions to the owner and read permissions to the group and others. Secondly, the password file is being copied to the temporary file which means we can access the password from this owner!

We can then go to the temporary file and collect the password to the next level

Level 23
Once again we are told that there is a cronjob running. We can go to the same location as before and find the bash script being used via cat cronjob_bandit23
Viewing the bash script, it's no too dissimilar to the last one. We can see that the password file is copies to a new temp location, only this time the temp location is made using a md5sum.
Running the code line by line allows us to see the output, we can then go to the temp location and grab the password.
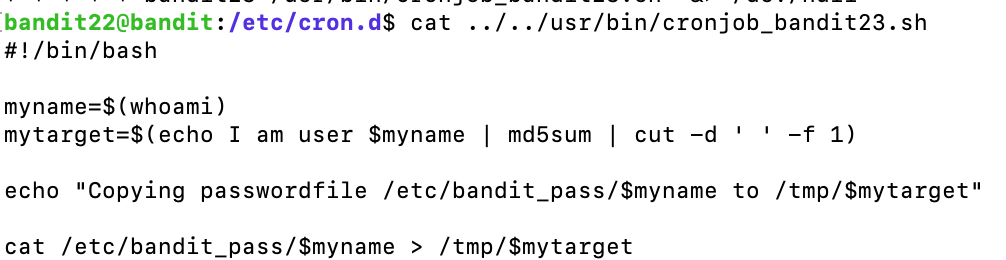

Note: The cut is required due to the extra - input from stdin that is produced in md5sum
Level 24
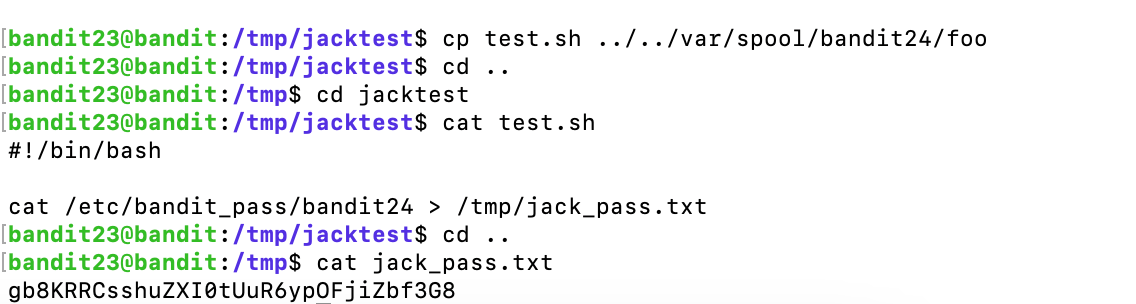
We get to make our own bash script in this one! The cron job shown for this level executes files on bandit24 in /var/spool/bandit24/foo.
We can make our own script which copies the bandit password from bandit24 and pastes it in a password file on bandit23's machine to complete the level (Note: this took me a while to figure out why it wasn't working. Turns out I was trying to paste the file in a temporary directory that bandit24 couldn't see as I had made it :/)
Level 25
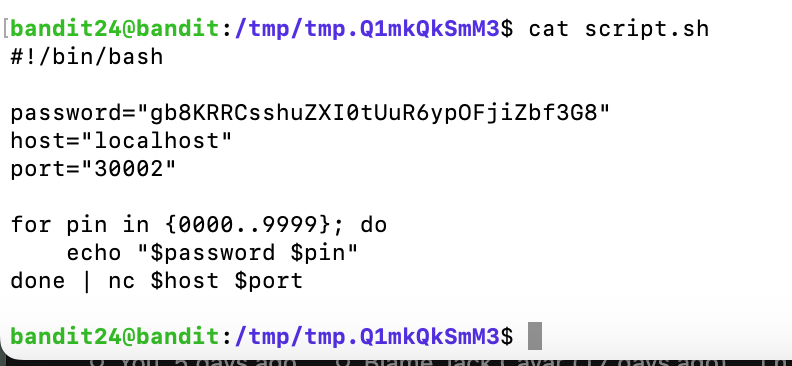
We are told that there is a daemon running on port 30002 and that if we feed the password of bandit 24 alongside a unspecified 4 digit password, we will get the bandit25 password.
Getting bandit 24's password is easy, we can use the same method as before to get the password. The unspecified 4 digit password is a little more tricky and will have to be bruteforced.
We are going to need a bash script to do this.
Before doing anything we can connect to the port using netcat nc localhost 30002 and see what happens. We see that we have to enter the bandit24 password and then the 4 digit passcode with a space between as well. We can also see that the connection persists between failed attempts. This means we can connect once and enter digits until the connection is made.

Our bash script must first make a connection to the host once and pipe the result of the pincode into it also. We can do that with the script below. This gets us the password for the next level which we can then go to next level!
Level 26
We are given a private key for bandit26 that allows us to login to the next level. Using ssh we are told that the connection is denied. Looking at the bash terminal for bandit26, we see that it is not a bash terminal at all!

Having a look within the file provided, we see that when we attempt a ssh connection, it is running the more command.
The more command allows more information to be displayed on the screen at once.
Making the window really small and sshing into the window allows us to keep the shell open without it immediately loggin us out as the more command is working.
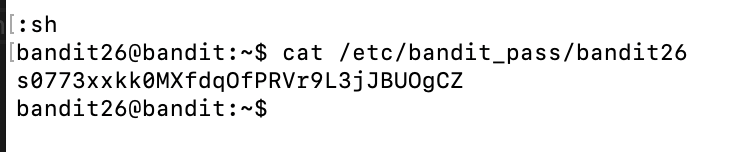
We can then open a vim shell with v and write :set shell=/bin/bash then execute with :sh
This gives us access to bandit26 and we can grab the password
Level 27
HURRY! We are given a bandit27-do file and it allows us to act as bandit 27 just like in level 20 with the setuid binary. We can use this to get the password to the next level!

Level 28
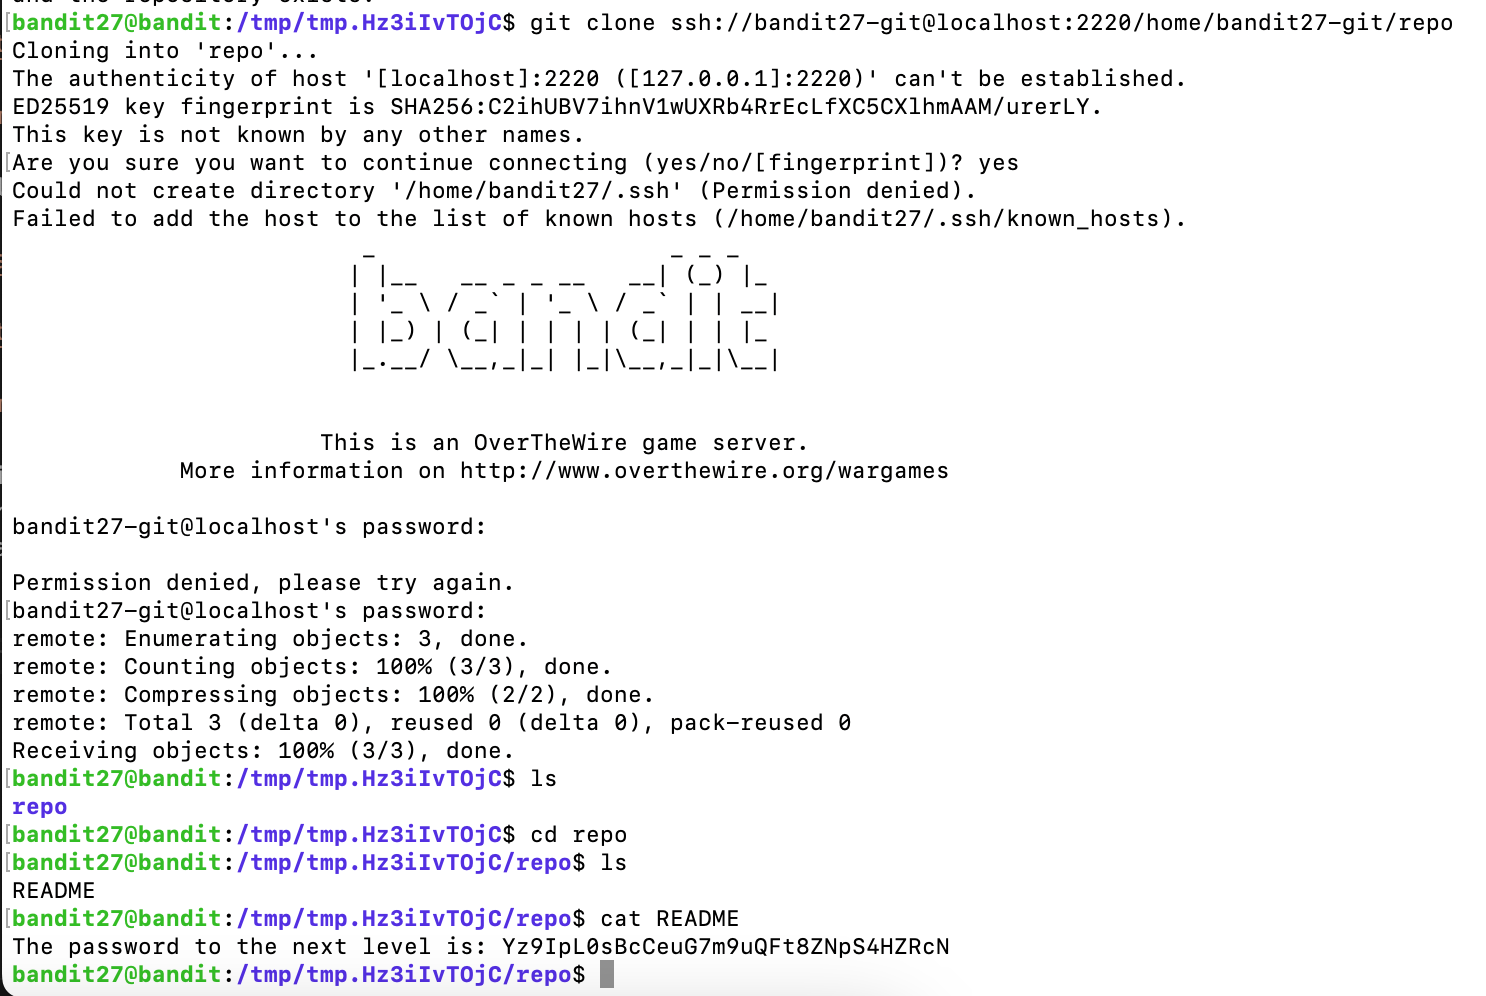
We are given a git repository link within the server that we have to clone with git clone "link".
We must make sure to specify the port on localhost as 2220 as it will default to 22 which is not allowed.
After doing that we can open the readme file in the repository and move onto the next level
Level 29
In this level we are told the exact same info as the last level. There is a git repository with the password to the next level. Cloning the repository we see that the password is blanked in the README file.
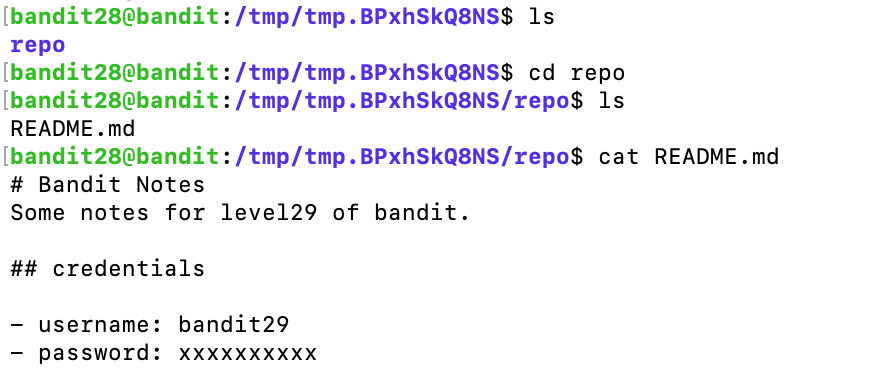
There isn't anything else. Where is the password. Remember we're using git here so we can check the history of this file and the changes made to it through the logs. Having a look at the logs we see three changes.
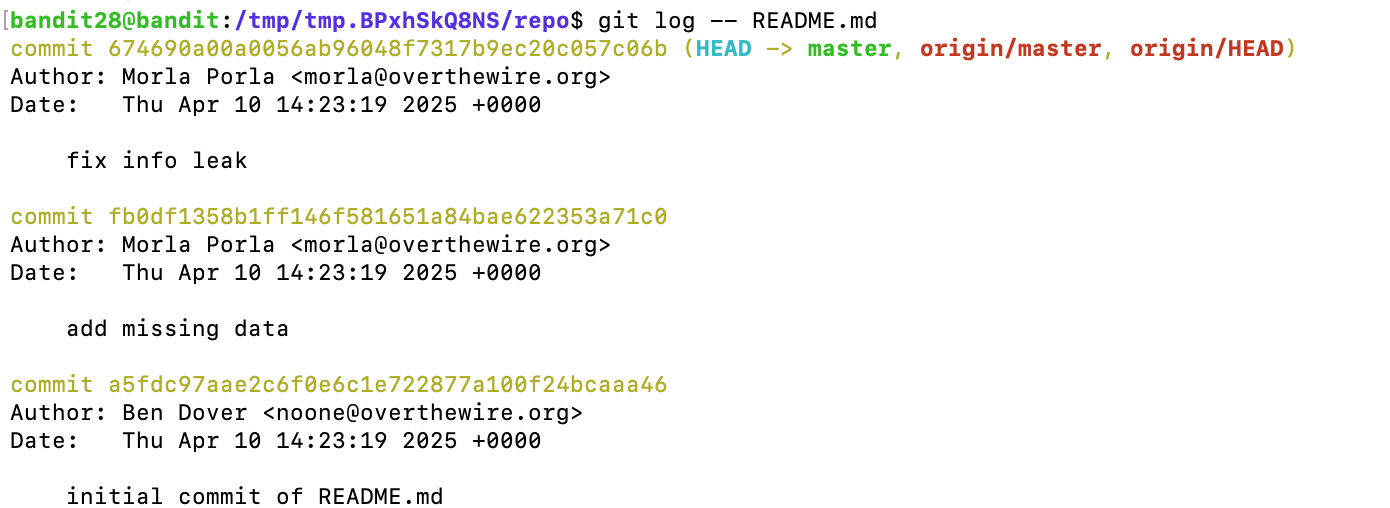
Ah ha! There is a missing data update. We can git checkout this and grab the password to the next level!

Level 30
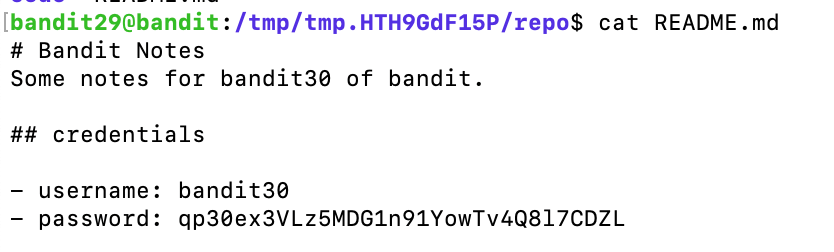
In this level we are once again given a git repo to clone. Cloning it and looking at the readme shows that the password isn't in production.
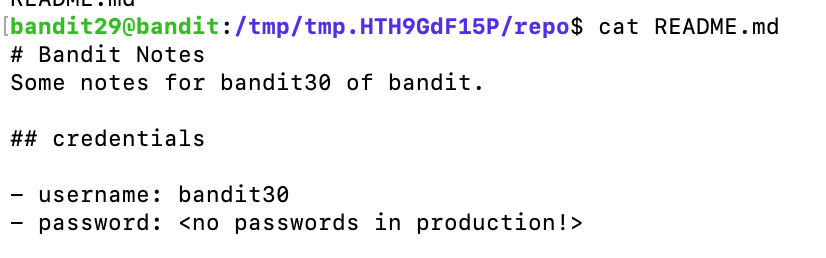
We will have to look and see if there are any other branches in the repository.

There is. git checkout dev shows a readme file with the password to the next level
Level 31
Once again we are given a repo to clone. Going into the readme, we are given a file that mocks us.

Instead we have to go lower into the tags of git to find the password for the next level

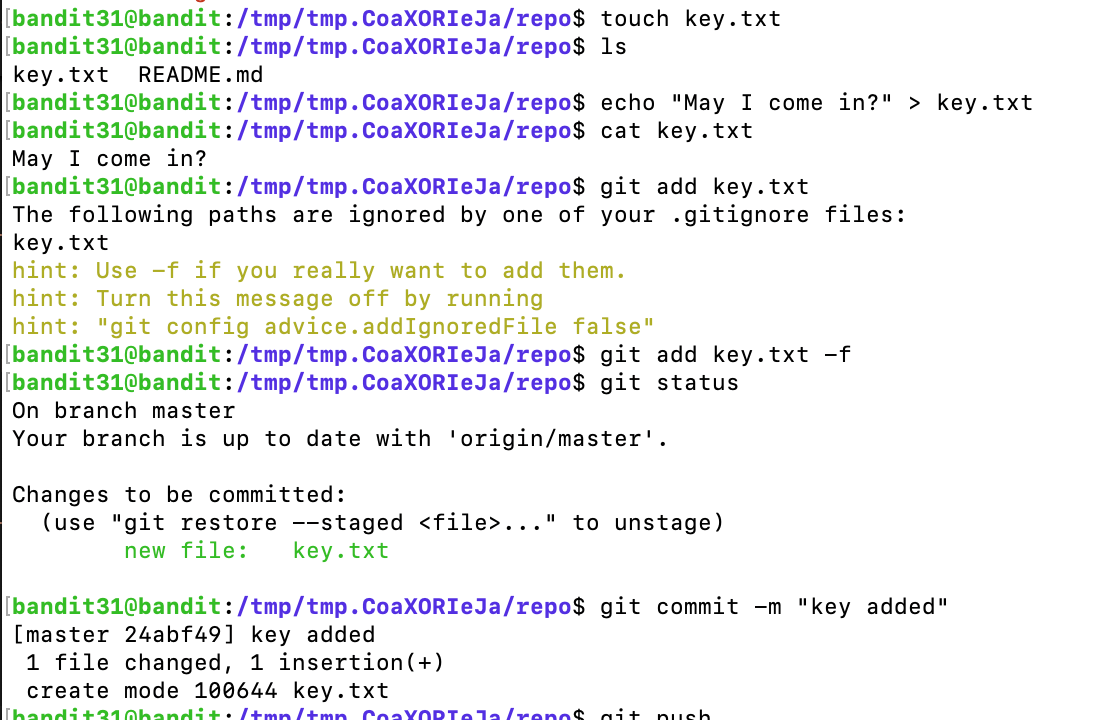
Level 32
Once again we are given a clone of a repo. This time we must make and push a file with specific contents to the branch.
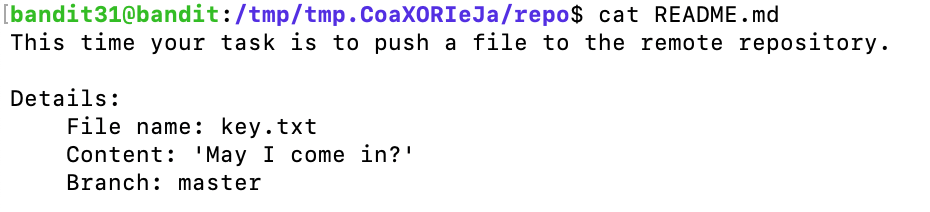
We must git add, git commit and git push to complete the connection and get the password to the next level

Level 33
In this level, we get a uppercase shell. This shell makes everything uppercase and as there are no commands in uppercase on linux, we are denied permissions.
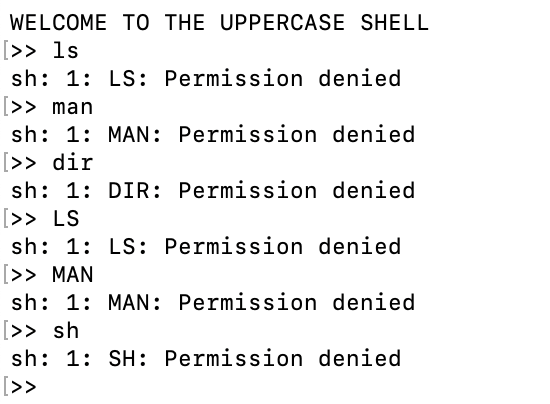
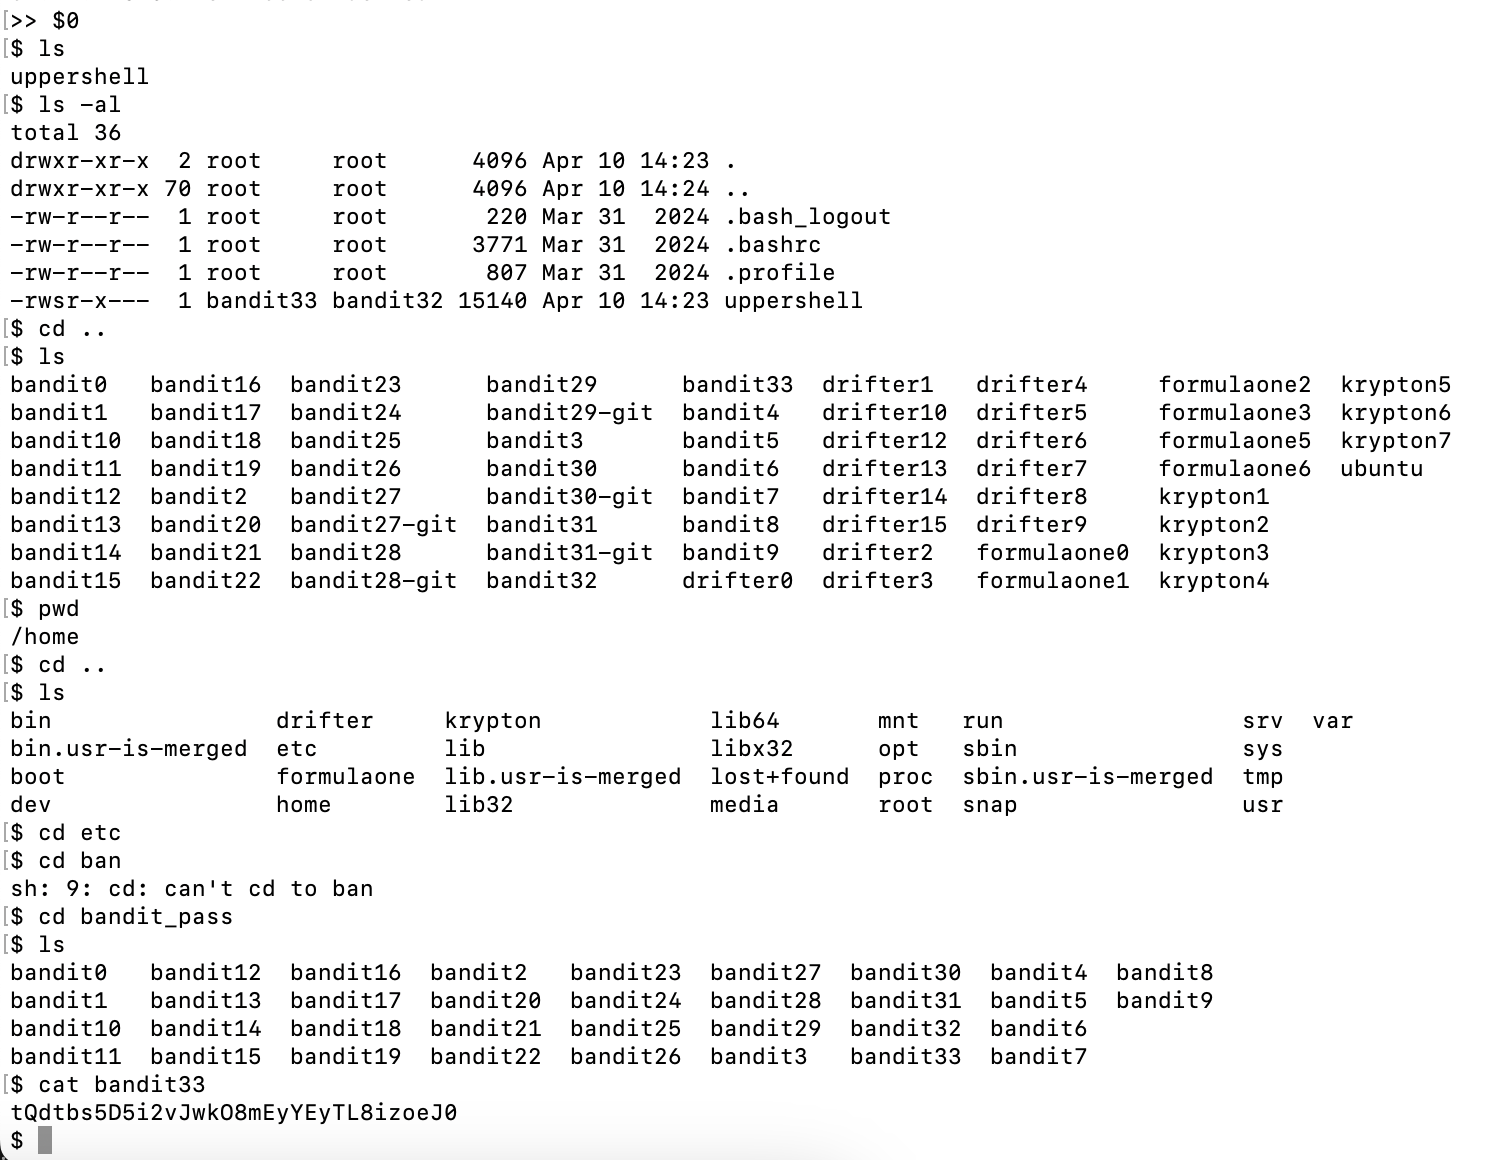
It's running a program which is forcing this to happen! We must escape it. using the $0 command we can leave the shell and go to the main shell of the user. The $0 command acts as a special shell command and allows for the file name of the program running to be displayed, cancelling the program at the same time.
We can then go and collect the password to the next level.
The end
There is no bandit34 as of writing this so this is the end for now! This is the first time I've completed something like this in some time and it feels really good to do. I'm looking forward to experimenting more in the future writeups. I know that the explanations here are poor and fragmented but it's a start and you've got to begin somewhere.